The 3D printing community has long entertained a seductive fantasy: snap a photo, click a button, and hold a physical object in your hands an hour later. For years, that promise remained firmly in the realm of concept videos and polished demo reels. Most AI-powered 3D generators produced models that looked impressive on screen but collapsed in a slicer—paper-thin walls, intersecting faces, non-manifold geometry that existed only in a render. The gap between “visual AI” and “printable mesh” has been wide enough to discourage all but the most determined tinkerers.
Then imgtostl appeared on my radar. Not as another flashy AI demo, but as a tool that explicitly positions itself for functional 3D printing rather than visual concepts. That distinction matters. A model that looks beautiful in a browser viewport is useless if it fails the manifold check in PrusaSlicer. So I decided to put this image-to-STL converter through a practical testing regimen—not to crown it as some kind of magic bullet, but to understand whether it actually reduces the friction between a visual idea and a physical print.
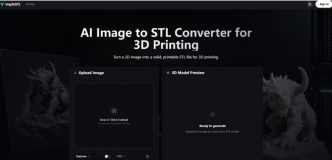
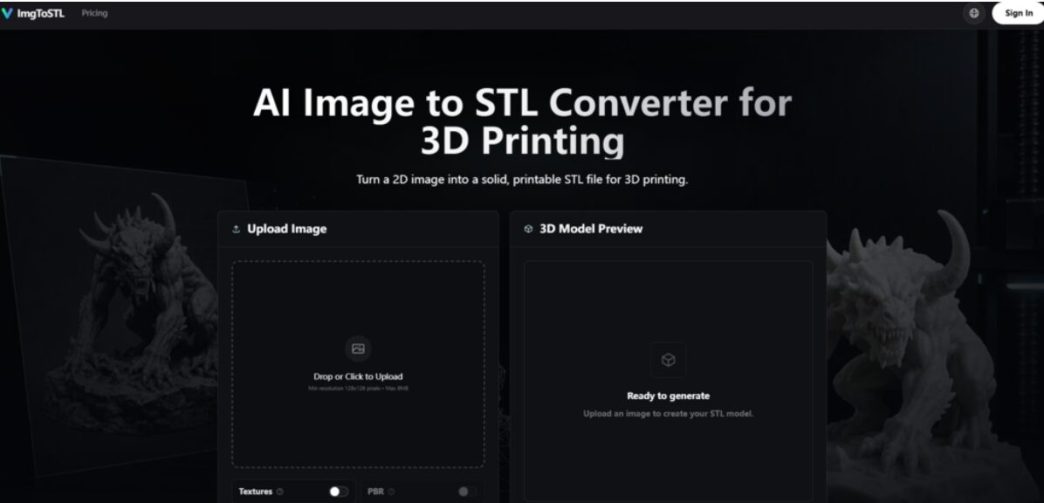
The Three-Step Pipeline That Actually Makes Sense
What immediately sets this tool apart is the clarity of its workflow. The site outlines a straightforward three-stage process, and in practice, it’s as direct as advertised. No confusing parameter panels, no model selection dropdowns, no buried settings that require a engineering degree to interpret.
Upload: Getting the Image In
The format and size requirements are refreshingly simple. The upload step accepts JPG, PNG, JPEG, and WebP formats. The minimum resolution is 128×128 pixels, and the maximum file size is 8MB. That’s it. Drop your image or click to upload, and the system takes over.
But here’s where the real guidance begins. The platform doesn’t just accept anything and hope for the best. It provides clear, practical advice on what makes a good source image. Product photos, character concepts, props, sketches, and simple part photos with a centered subject, strong lighting, visible edges, and a clean background tend to produce the cleanest results. Thin wires, transparent objects, reflective surfaces, low-contrast photos, and busy backgrounds—these are the troublemakers. The tool warns you upfront, which saves time and frustration.
Generate: The Mesh Creation Stage
This is where the AI does its work, and the approach is worth understanding. Unlike traditional heightmap-based converters that simply extrude image brightness into a 3D surface, this system attempts to interpret the subject as a three-dimensional form. For photos and sketches, the AI analyzes the subject shape, silhouette, contrast levels, visible depth information, and object boundaries. It then generates printable geometry designed for 3D printing workflows rather than visual embellishment.
The generation happens quickly. In my testing, clear, well-composed images produced usable meshes on the first attempt. More challenging inputs sometimes required a better source image or minor adjustments, but the tool is designed for rapid iteration. You’re not waiting hours for a single result—you can test, evaluate, and refine without losing momentum.
A preview is available before you commit to downloading. This is a small but critical feature. You can rotate and inspect the model, evaluate the geometry, and decide whether the result meets your needs. No credits are wasted on models that don’t work for your use case.
Export: Preparing the Model for Slicing
The final stage delivers the model in STL format, which remains the standard for most 3D printers. The platform also supports GLB, OBJ, and FBX exports for users who need broader compatibility or plan to refine the model in other software.
But the tool doesn’t pretend the job ends at export. After downloading, the site recommends inspecting the mesh before printing. STL files contain geometry only—scale, wall thickness, orientation, supports, and material settings must be checked in your slicer or modeling tool. Recommended tools include Cura, PrusaSlicer, Bambu Studio, Blender, Meshmixer, Fusion 360, and Tinkercad. This honest acknowledgment of the full workflow builds trust. The tool handles the hard part—turning a flat image into a printable mesh—but it doesn’t claim to replace the rest of the 3D printing process.
Testing the Tool Across Real-World Scenarios
To evaluate practical performance, I ran the tool through several common 3D printing use cases. The results varied by image type, which is exactly what you’d expect from a tool that doesn’t overpromise.
Miniatures and Tabletop Props
The first test involved a character concept illustration with a clear silhouette and simple background. The AI successfully generated a model that captured the character’s overall proportions and pose. The mesh passed the manifold check in PrusaSlicer, which was the first sign that this tool takes printable geometry seriously.
The generated model wasn’t production-ready out of the box—additional refinement would improve final print quality—but it provided a strong starting point compared to building the model from scratch. For tabletop gaming enthusiasts and miniature creators, the workflow offers a practical shortcut from concept art to printable figurines.
Replacement Parts from Photos
The second test involved a photograph of a broken plastic bracket with thin features and a more complex profile. This is the kind of use case that excites makers and hobbyists—the ability to photograph a broken part and generate a replacement model without manual CAD modeling.
The generated mesh accurately represented the overall shape. Some thinner elements benefited from manual reinforcement in Blender, but the model significantly reduced the amount of manual modeling required. For rapid prototyping and replacement-part development, this is a genuine time-saver.
Sketch-to-Model Conversion
A conceptual jewelry sketch served as the third test. This evaluated the tool’s ability to interpret hand-drawn or digital sketches rather than photographs. The resulting model accurately reflected the intended design and could serve as a prototype for further refinement in CAD software.
This workflow may be especially useful for designers who need to move quickly from early sketches to physical models. It doesn’t eliminate the need for CAD refinement, but it compresses the timeline from concept to physical prototype considerably.
Beyond the Core Conversion: Textures and PBR Maps
The platform offers additional capabilities that extend beyond basic STL conversion. Texture generation creates color texture maps for models that need visual detail. PBR map generation adds roughness and metallic material maps, which is useful for users working in game development, visualization, or any context where material properties matter.
What You Can Actually Create With This Tool
The use cases extend across multiple domains, and the tool provides concrete examples rather than vague promises.
Miniatures and tabletop props are an obvious fit. Turn reference art or character photos into a 3D starting model for figurines and tabletop props. The generated mesh provides a foundation that can be refined for printing.
Photo-to-STL for custom parts is another strong use case. Convert photos of broken parts or 2D CAD sketches into STL models ready for slicing and printing. This is where the tool shines for practical, functional 3D printing rather than artistic expression.
Rapid prototyping benefits from the speed of the workflow. Move instantly from a quick product sketch to a 3D model that can be refined for prototype work. The iteration speed alone makes this valuable for product designers and engineers.
DIY and cosplay armor creators can turn custom character sketches, jewelry designs, or armor concepts into physical 3D-printable parts. The tool reduces the barrier between concept and physical object.
Logo-to-STL for signs, embossed nameplates, keychains, plaques, and simple brand assets is another practical application. For logos, icons, and QR codes, a dedicated relief or extrusion workflow may be more predictable than full 3D reconstruction, but the tool handles these use cases effectively.
Lithophane-style photo reliefs, terrain relief models, tabletop accessories, and miniature props round out the list of possibilities.
A Quick Comparison: How This Approach Stacks Up
| Aspect | ImgToSTL | Traditional CAD Modeling | Basic Heightmap Converters |
| Learning Curve | Minimal—upload and generate | Steep—requires software proficiency | Low—but results are limited |
| Workflow Clarity | Three transparent steps | Complex, multi-stage process | Simple but one-dimensional |
| Output Quality | Printable geometry with structural integrity | High precision with full control | Flat relief with limited depth |
| Best For | Rapid prototyping, replacement parts, concept validation | Production-grade precision parts | Simple embossing and logos |
| Time Investment | Minutes per model | Hours to days per model | Minutes—but output is limited |
| Mesh Reliability | Generally printable, passes manifold checks | Fully controllable | Often requires manual repair |
The Real Limitations You Should Know
No tool is perfect, and this one doesn’t pretend to be. Being honest about the limitations is essential for setting realistic expectations.
Image quality directly impacts results. The tool performs best with clear, well-composed images. Blurry photos, low-contrast subjects, or images with busy backgrounds produce weaker results. This isn’t a limitation of the AI—it’s a fundamental constraint of any image-to-3D conversion process. The tool provides clear guidance on what works and what doesn’t, which is more than many competitors offer.
Complex scenes may require multiple attempts. The AI attempts to interpret the subject as a three-dimensional form, but it’s not omniscient. Challenging inputs sometimes require a better source image or minor adjustments. The rapid iteration speed makes this manageable—you can test, evaluate, and refine without significant time investment.
The generated model is a starting point, not a finished product. Additional refinement in software like Blender, Fusion 360, or Meshmixer may be necessary for production-ready results. The tool acknowledges this explicitly, which builds trust rather than overpromising.
Effectiveness varies by image type. Photos and sketches with clear subjects produce fuller 3D forms. Logos and flat art may behave more like relief or embossed shapes. Understanding this distinction helps users choose the right images for their specific needs.
Some images are inherently risky. Thin wires, transparent objects, reflective surfaces, low-contrast photos, and busy backgrounds tend to produce weaker results. The tool warns users about these pitfalls, which is a sign of responsible product design.
The mesh should be inspected before printing. STL files contain geometry only, so scale, wall thickness, orientation, supports, and material settings must be checked in your slicer or modeling tool. This is standard practice for any 3D printing workflow, but it’s worth emphasizing.
Who Benefits Most From This Workflow
Based on my testing and the platform’s real capabilities, this convert image to stl tool is most valuable for specific groups.
Makers and hobbyists who need to quickly turn reference images into printable models will find the workflow genuinely useful. Whether you’re prototyping a replacement part, creating a tabletop miniature, or testing a product concept, the speed and accessibility of the tool reduce friction significantly.
Product designers and engineers working on rapid prototypes can move from sketch to physical model in minutes rather than days. The ability to iterate quickly—test a concept, generate a model, print it, evaluate it, and refine—accelerates the design process meaningfully.
Cosplay and prop makers who work from character references, concept art, or photographs can generate starting models for armor pieces, props, and accessories. The tool doesn’t replace the craftsmanship of finishing and detailing, but it eliminates the need to model everything from scratch.
3D printing beginners who lack CAD skills can bridge the gap between visual ideas and physical prints. The straightforward workflow and clear guidance reduce the intimidation factor of 3D modeling.
Small business owners creating custom products, signage, or branded merchandise can generate STL models from logos, artwork, or product photos without hiring a 3D modeler.
The Bottom Line
ImgToSTL does not pretend to replace skilled 3D modeling, and it does not claim to produce production-ready parts with a single click. What it does offer is a practical, accessible bridge between 2D visual ideas and printable 3D geometry. The tool focuses on creating usable printable meshes rather than producing purely visual renders, and that focus shows in the results.
In my testing, clear, well-composed images produced usable meshes on the first attempt. More challenging inputs sometimes required better source images or minor adjustments, but the rapid iteration speed made this manageable. The preview functionality, transparent workflow, and honest guidance on image selection all contribute to a tool that respects its users’ time and intelligence.
The 3D printing community has been burned by overhyped AI tools that produce beautiful renders and unusable meshes. This tool takes a different approach—practical, transparent, and focused on printable geometry. It won’t replace your CAD software, and it won’t eliminate the need for post-processing and refinement. But it will significantly reduce the time and friction between a visual idea and a physical print. And for many users, that’s exactly what they need.