
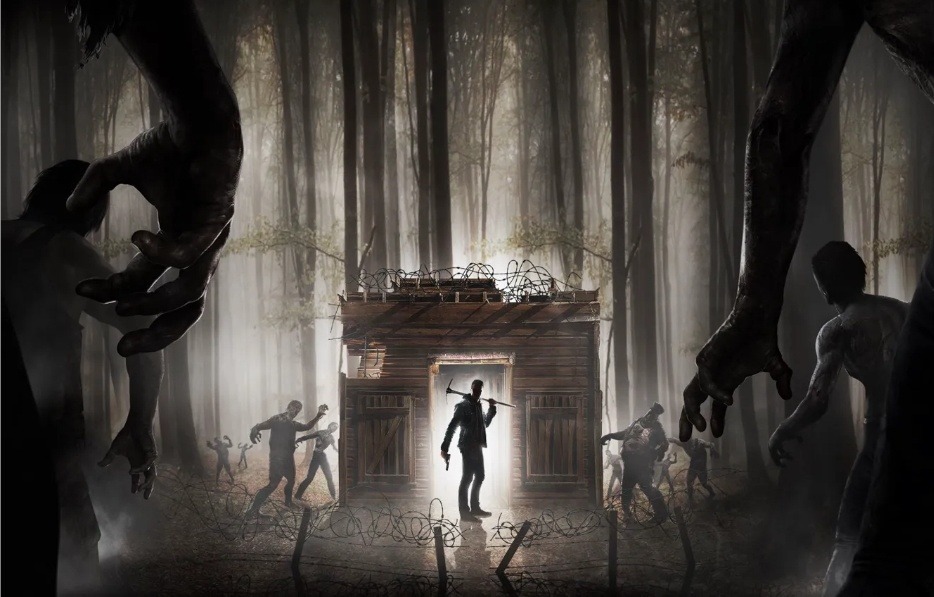
There is a specific kind of dread that builds in 7 Days to Die as the calendar ticks toward day seven. The sky begins to shift. Zombies that were slow and predictable during the week suddenly move with purpose. And then the horde arrives. For players experiencing their first Blood Moon, the chaos is usually overwhelming. For veterans, it is the defining rhythm of every playthrough — the deadline that organizes everything else.
Getting through that first horde night, and every one that follows, requires preparation that starts on day one. This guide covers the systems, strategies, and habits that turn Blood Moon survival from a desperate scramble into a structured challenge worth looking forward to.
Getting Your 7 Days to Die Key
For players who have not yet purchased the game, picking up a 7 days to die key through a trusted shop is the fastest path to getting into Navezgane. LootBar game key purchases are handled digitally with fast delivery, and the checkout process is built for simplicity — players receive their key and can activate it immediately without delays.
LootBar’s reputation as a reliable game shop is well-established, backed by a large volume of verified buyer reviews and strong trust ratings from independent sources. The shop carries competitive pricing and supports a wide range of payment methods, making it accessible for buyers across different regions. Customer support is available at all hours, which is genuinely useful if any issue arises with a key purchase.
What Actually Happens During a Blood Moon
Understanding the mechanics behind the Blood Moon removes much of its mystique and makes it far more manageable. Every seven in-game days — adjusted by server settings — the game enters horde night. The trigger is time-based, not condition-based, meaning there is no way to delay or avoid it. The horde is coming regardless.
What changes during Blood Moon is zombie behavior at a fundamental level. Standard zombies gain significantly increased speed, aggression, and problem-solving capability. They will sprint, climb, dig through floors, and dismantle walls to reach the player. Ferals and radiated variants appear in higher numbers as the night progresses, and special zombie types — the Demolisher being the most notorious — introduce explosive threats that punish unprepared base designs.
The horde scales with the game stage, a hidden value that increases based on player progression, loot stage, and days survived. This means early Blood Moons are manageable with basic preparation, but later hordes become genuinely dangerous even for experienced players.
Picking the Right Location Before Day Seven
Base location has as much impact on Blood Moon survival as base design. A structurally impressive base in a poor location — surrounded by tall terrain that zombies can use to approach from multiple angles, or built too close to a trader with heavy foot traffic — creates problems that clever engineering cannot fully solve.
Flat, open ground gives defenders the clearest sightlines and removes the terrain advantages that zombies exploit to approach from unexpected angles. Urban areas offer strong existing structures to fortify, but require more investment to clear and seal properly. Rural positions give more flexibility for designing purpose-built horde bases but offer fewer ready-made structural options.
One of the most reliable early-game strategies is finding a two-story building with solid walls and a roof accessible by ladder — then removing or blocking the ladder access point. This creates natural height separation that forces zombies to destroy their way up rather than simply climbing in, buying significant time with minimal early investment.
Materials, Upgrades, and Structural Integrity
Wood will not carry players past the early Blood Moons. Zombie fists and tools tear through wooden structures with uncomfortable speed during horde night, and the damage compounds quickly when twenty or thirty zombies are simultaneously hammering the same wall section. Upgrading to cobblestone — and then to concrete as soon as the resources allow — is the single highest-impact structural improvement available to any player.
Prioritize upgrading the sections of the base that zombies are most likely to target first: the base of exterior walls, support pillars that carry weight for upper floors, and floor sections directly beneath firing positions. Structural integrity in 7 Days to Die is a physics system — blocks that lose support from below can collapse entire sections above them. Reinforcing vertical load paths before a Blood Moon prevents catastrophic structural failures mid-horde.
Checking and repairing base damage after every Blood Moon is non-negotiable. Breach points that survive into the next cycle weaken under regular wear and become critical vulnerabilities on the following horde night.
Stocking Up: Resources That Actually Matter
The week before a Blood Moon is a resource race, and knowing which resources matter most prevents wasted time. Ammunition is the obvious priority — shotgun shells for close quarters, rifle rounds for crowd control at range, and sufficient reserves to sustain a full night of combat without running dry. Running out of ammunition mid-horde and transitioning to melee combat against a frenzied crowd is a common way for otherwise well-prepared runs to end.
Medical supplies deserve dedicated attention separate from the ammunition budget. First aid bandages, painkillers, and splints should be staged in an accessible hotbar slot rather than buried in a storage chest. Taking damage during horde night is inevitable, and the ability to self-heal without interrupting combat significantly extends survival time.
Food and water should be at full capacity before the sun sets on day seven. Managing hunger or thirst during a Blood Moon is a distraction that pulls attention away from the horde at the worst possible time.
Spike traps, barbed wire, and blade traps — even basic versions — placed along likely approach corridors dramatically reduce the pressure on active defenses. They deal consistent passive damage, slow zombie movement, and force the horde to consume resources tearing through obstacles rather than heading directly for the player.
Designing a Horde Base That Works
Experienced players build a dedicated horde base separate from their main storage and crafting facility. This distinction is deliberate: the horde base is designed to absorb punishment and channel zombies into kill zones, not to remain pristine. Losing a horde base to zombie damage is an inconvenience; losing a main base to the same damage is often a run-ending event.
The kill corridor is the most effective general-purpose design for horde bases at most progression levels. A narrow channel — wide enough for two or three zombies abreast — leads toward the player’s firing position, lined with traps on both sides and overhead. Zombies entering the corridor are slowed by traps, damaged passively, and funneled into a concentrated area where every shot lands efficiently.
Adding a height element to the design — a firing platform elevated above the corridor exit — combines the kill corridor’s efficiency with the defensive advantages of elevation. Zombies targeting the player below their level must destroy structural supports rather than simply reaching through, which significantly extends the time before the position is compromised.
Combat During the Horde
When the Blood Moon begins, positioning discipline matters more than raw firepower. Standing in the open and sprinting to avoid zombies burns stamina quickly and removes the structural and positional advantages that a well-designed base provides. Holding a firing position inside the kill zone, moving only when structural integrity forces a fallback, consistently outperforms mobile play during heavy horde pressure.
Target priority during the horde should follow a clear mental hierarchy. Demolishers are the highest priority at all times — their explosive deaths deal massive structural damage and can collapse sections of a base that survived the rest of the horde intact. Radiated variants require additional attention because of their resistance to standard damage and high hit points. Fast-moving ferals should be addressed before they reach melee range with the player.
Stamina management is often overlooked but consistently important. Sprinting, melee attacks, and vault actions all drain stamina rapidly. Keeping a food item with stamina restoration queued during heavy moments, and relying on ranged combat to preserve stamina for movement, maintains performance through a full night rather than degrading in the final hours when horde density peaks.
After the Horde: Recovery Phase
Surviving a Blood Moon is satisfying, but what happens on day eight often determines the quality of the next cycle. Repairing base damage before any major looting run keeps vulnerabilities from compounding into the next horde. Looting zombie corpses from the horde itself is worth the time — Blood Moon zombies consistently drop better loot than standard wandering enemies, providing a meaningful resource injection that offsets some of the repair costs.