The basics of creating a website
Sites is a Google service that helps you create websites. You can use the freely available web service to create dynamic and interactive websites with just a few clicks. No HTML knowledge is required!
By default, Sites uses a WYSIWYG editor. Its interface also accommodates advanced users who wish to manually edit HTML code.
Because Google Sites is a Google service, before you can use it to build websites you’ll need to first sign up for a free Google account. Fire up your web browser and head to the Google Sites website to register a new account.
If you’re already registered with any other Google service, such as Gmail, you can use the same credentials to log into Google Sites.
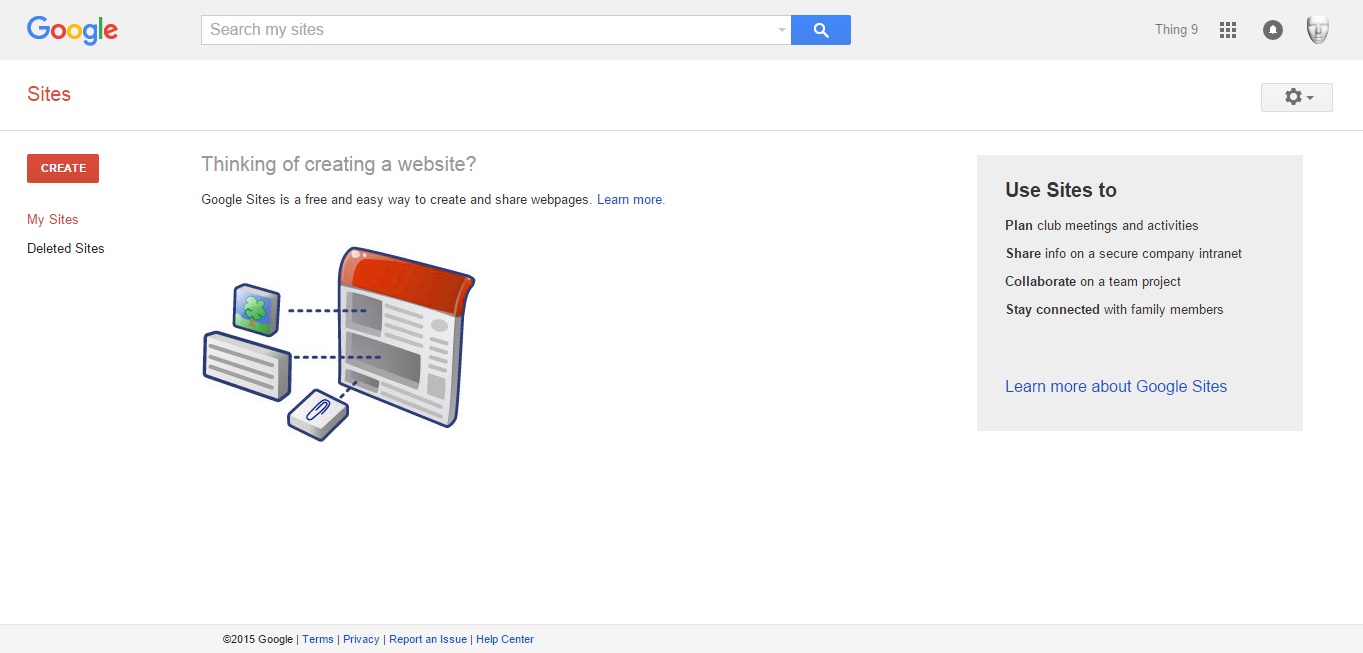
Once you’ve logged in, you’re dropped off at the Sites bare-bones dashboard. From here, follow the walkthrough below to craft a great-looking new website in a matter of minutes.
1. Choose a name and address
Click the button labelled Create on the Sites dashboard which takes you to the Create new site screen. Here enter the name of your site which is automatically appended to the URL of your website, without any spaces.
Remember however that unlike the name of the website, the URL should be unique.
2. Select a template and theme
By default, Sites doesn’t use a template for new websites to give you full control over its design. However, you can base your website on an existing template.
Select one of the listed popular templates or click on the ‘Browse the gallery for more’. Next, expand the ‘Select a theme’ drawer and choose from one of the listed themes.
3. Edit site layout
Sites will now create your new website and you can edit and customise it using the buttons in the top right corner. To change the default layout, click the Gear icon and go to ‘Edit site layout’.
You can now enable/disable and rearrange certain elements of your website such as the sidebar, depending on the theme you selected earlier.
4. Create a page
To add a new page, click on ‘Create page’. Then, name the page and the template it’ll be based on. Use the default Web Page template.
Click on ‘Learn more’ to read about the other templates. Finally, select a hierarchical position for the page, for example, whether you want to place it besides existing pages or underneath one.[related-posts]
5. Add content
You’ll now be taken to the WYSIWYG interface of Sites to add and edit content. The interface looks similar to any text editor.
You can use the menus on top to change the layout of the page, add multiple columns, insert tables, images, and even include a +1 button for visitors to recommend the page.
6. General website management
Repeat steps 4 and 5 to flesh out your website with multiple pages and content. Before you unveil your creation to the world, set and configure some critical elements by clicking on the Gears button and heading to Manage Site.
Here you can change the name of the website and add a more detailed description.
7. Control Access
To control access to your website, click on the Gears icon, head to the Manage Site option and switch to Sharing and Permissions.
By default, new websites can be viewed by anyone. To curb access, click on the Change… link under ‘Who has access’ to restrict access either to a URL to your website or a specific list of people.
8. Track and revert changes
That’s it, you can now invite other users to view your website. As you modify your website over time you can keep track of the changes by clicking on the Gears icon and heading to Revision History.
Click on the ‘view page listing’ link at the top to list all the pages on your website. From here you can view all versions of a particular page.