Many times, we accidentally delete all of our prized information from our Smartphones! Sometimes it may be a child who got his hands on your smartphone and wiped your camera roll clean.
Save your tears for now because you actually may be able to get some information back like the photos.
There’s no 100 percent guarantee that the methods will work, but they’re worth a shot before paying for a professional recovery service or giving up completely.
Recovering photos from a memory card
Before diving into the recovery process, it might help to understand what happens when you delete a photo from your memory card. Doing so doesn’t actually completely erase the files from the card. The data is still there. The system just marks the space as available for use for other files (new pictures).
Still, in this case, it’s important that you don’t take any new photos, since they might overwrite the space of the deleted photos, at which point they’re totally gone. If you follow that rule, there’s a good chance that you’ll get those images back using recovery software.
You can use recovery software like PhotoRec to locate your missing images.
PhotoRec software by CG Security costs nothing, and works with Mac and Windows. Although it has a rather intimidating user interface, there is a step by step guide available.
In-case your phone has no Memory Card, a desktop software app like Kvisoft Data Recovery, which is available for Windows and Mac can help. The app will scan your Android device for deleted files for free, but in order to recover them, you have to upgrade to the paid version, which costs $70.
Here’s how to use the app:
Step 1: On your Android smartphone, make sure the USB debugging feature is enabled. To do this on an Android 5.0 device, go to Settings > About phone > Build number, and then tap a few times until you get a messaging saying, “You are now a developer!” Return to the Settings menu, select Developer Options and turn on USB debugging. You can find directions on how to do this on older Android devices here.
Step 2: After launching the app, connect your smartphone to your computer via USB cable, and select Multimedia/Mobile Device from the main menu.
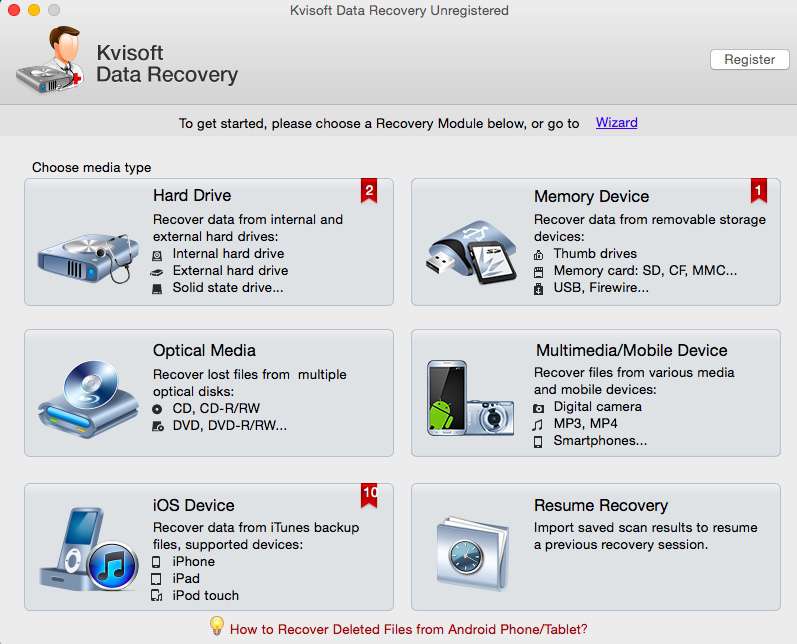
Step 3: On the next screen, select your device to scan files (again, if your phone doesn’t show up under a familiar name, look for similar capacity size as a clue) and then press Start.
Step 4: Once the scan is complete, you can preview and select which files you want to recover using the menu on the left side. After that, click the Recovery button and select where you would like the files to be stored.

Hopefully, one of these solutions will help you recover your photos. If not, you still have other options, like professional data-recovery services.
Via Recode.net