You deleted some files, certain that you no longer needed them, but then realized that some of them were actually important after all. And now you think it’s the end of the world.
Don’t rush to panic. What feels like a permanent, irreversible deletion on your Mac is rarely the absolute end of the story. Here, we’ll prove it to you and show you that it’s possible to recover data from Mac.
Confirm That Your Files Were Permanently Deleted
If you can’t find a file on your Mac, don’t assume it’s been permanently gone right away. Files can sometimes end up in a different folder, remain in the Trash, or simply become hidden. Spending a minute checking these possibilities can save you from going through unnecessary recovery steps.
Option 1. Search for the File in Finder
Finder is the quickest way to check whether the file is still somewhere on your Mac. If Finder locates the file, you won’t need any recovery methods.
- Click the Finder icon in the Dock.
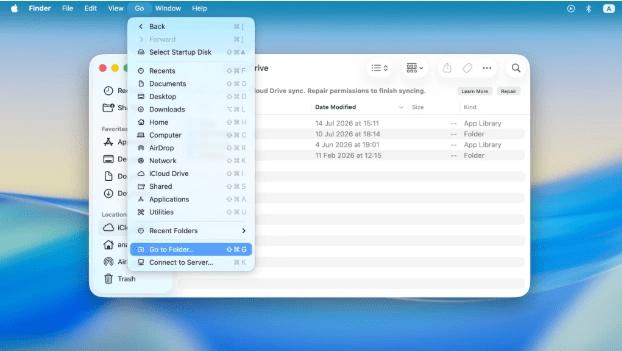
- If you remember where the file was stored, choose Go > Go to Folder, enter the folder name, and open it.
- Otherwise, use the search field in the top-right corner of the Finder window. Search by the file name, part of the name, file extension (such as .pages or .jpg), or even the date it was created or modified.
Option 2. Check the Trash
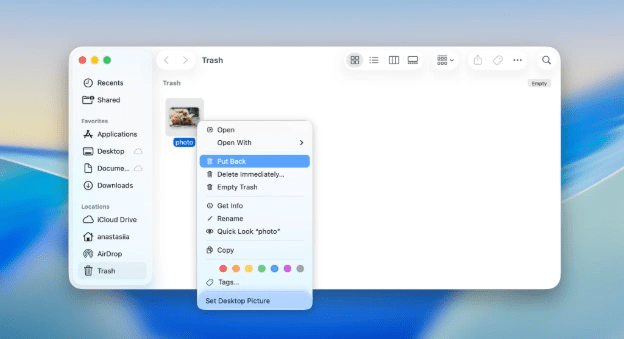
It may sound obvious, but still check Trash. When you normally delete a file on macOS, it isn’t erased immediately. Instead, it’s moved to the Trash, where it stays until you empty it. The same is for files deleted from external storage devices, such as USB flash drives, external HDDs or SSDs, and SD cards, as long as the device wasn’t disconnected from your Mac when the file was deleted.
To check:
- Open Trash from the Dock.
- Look for the missing file or folder.
- If you find it, right-click it and choose Put Back. The file will be restored to its original location.
Option 3. Make Sure the File Isn’t Hidden
Sometimes files are hidden instead of deleted, either intentionally or by accident.
The fastest way to reveal hidden files is:
- Open the folder where the file was stored.
- Press Command + Shift + . (period).
If you want hidden files to remain visible across Finder, you can enable them through Terminal:
- Open Terminal.
- Run: defaults write com.apple.Finder AppleShowAllFiles true
- Press Return.
- Then run: killall Finder
Finder will restart and display hidden files.
Methods to Recover Permanently Deleted Files on Mac
If you’ve gone through the checks above and confirmed that the files are truly permanently deleted, it’s time to start the recovery process.
The recovery method depends on your situation. If you never created backups before the files were deleted, your best chance is to use Mac data recovery software as soon as possible, before the deleted data gets overwritten. On the other hand, if you know you have backups but aren’t completely sure how to recover deleted Mac files using them, follow the steps described in Method 2.
Method 1. Recover Mac Files With Data Recovery Software
Once you’ve emptied the Trash or permanently deleted your files in another way, data recovery software is your best chance of getting them back.
If you’re looking for a reliable, safe, and easy-to-use recovery tool but aren’t sure which one to choose, Disk Drill is a great option. It features an intuitive interface that’s easy for beginners to navigate while still offering powerful recovery capabilities.
You can scan your drive, preview recoverable files before restoring them for free, and recover data from a wide range of file systems, including APFS, HFS+, NTFS, FAT32, exFAT, EXT4, and ReFS. It also supports both Apple Silicon and Intel-based Macs, making it one of the best Mac file recovery software options today.
But you should remember that no data recovery tool can retrieve deleted files that were stored on an internal SSD. This is because they use a feature called TRIM, which permanently erases deleted data blocks. Data recovery software is much more effective for external storage devices, such as external hard drives, USB flash drives, and SD cards, where TRIM doesn’t apply.
So, if you deleted files from one of these devices while it was connected to your Mac, or if you deleted files that were stored on your Mac but had previously been on one of these external devices, scan them.
To recover deleted files from a Mac with Disk Drill:
- Download and install Disk Drill. If you recover files deleted from the internal SSD, install Disk Drill on a different drive.
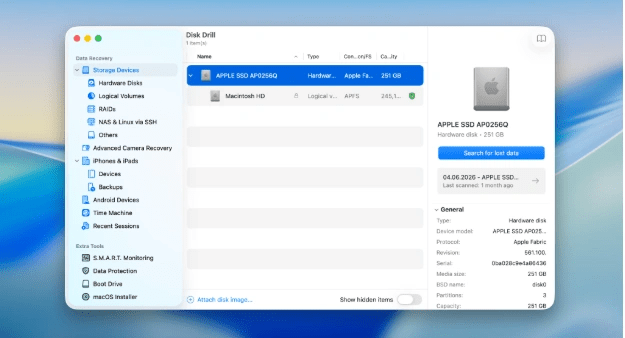
- Launch the application.
- Select the drive where the files were deleted.
- Click Search for Lost Data.
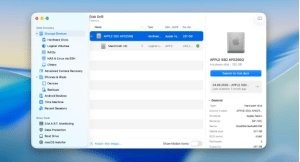
- If you’re scanning an external storage device, Disk Drill offers two scanning methods. You can start with Universal Scan, which supports photos, videos, documents, archives and many other file types. If you are recovering footage from a camera or drone and the recovered videos do not play correctly, try Advanced Camera Recovery, which is specifically designed to repair fragmented video files.
- When the scan finishes, click Review found items.
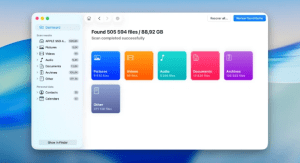
- Use the filters or search bar to find your files. Use the Preview feature to verify that your files are recoverable before restoring them.
- Select the files you want to restore and click Recover.
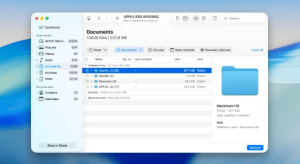
- Choose a destination on a different drive or location, then click Next.
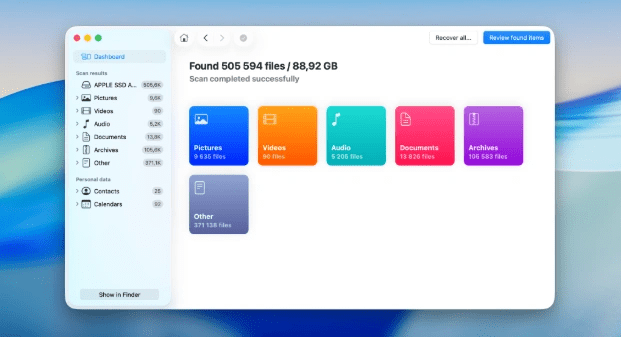
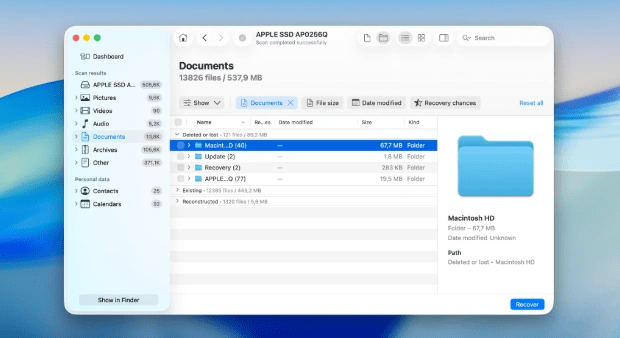
Note: The free version of Disk Drill doesn’t allow you to save recovered files. But, you can scan your drive and preview files without any limits, which allows you to check if the permanently deleted files can actually be retrieved before buying the paid version.
Method 2. Recover Mac Files With Backups
If you’re lucky enough to have backups, recovering your files is much easier. Instead of relying on data recovery software, you can restore your files using one of the backup methods below.
Option 1. Recover Data Mac With Time Machine Backup
If you had Time Machine enabled before your files were deleted, recovering them is usually quick and straightforward. Simply restore the files from one of your backups, and they’ll be returned to their original location.
To retrieve files with Time Machine:
- Connect the drive containing your Time Machine backup.
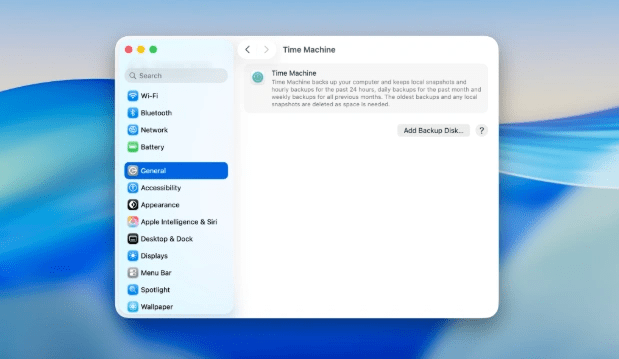
- Open Time Machine from Apps or the menu bar. Or open System Settings > General > Time Machine and launch it from there.
- Navigate to the folder where the deleted file was originally stored.
- Use the timeline on the right to browse older backups.
- Select the file you want to recover.
- Click Restore.
Option 2. Recover Data on Mac from APFS Snapshots
If you don’t have your external Time Machine backup drive with you, don’t worry. If you previously enabled Time Machine, macOS may have automatically created local snapshots on your Mac’s internal drive.
These temporary snapshots can sometimes let you recover recently deleted files even when your backup disk isn’t connected. You can also access these files through Browse Time Machine Backups, but without connecting your external Time Machine backup drive.
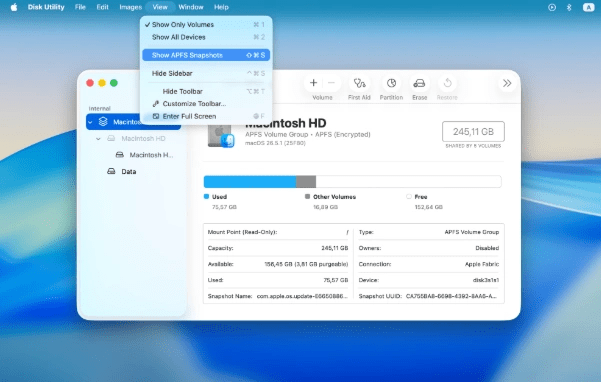
To check for APFS snapshots:
- Open Disk Utility. Use Spotlight or go to Apps > Utilities.
- Select your system drive.
- Choose View > Show APFS Snapshots.
- If snapshots are available, select one and mount it.
- Open the mounted snapshot in Finder.
- Browse to the folder containing your deleted files and copy them back to your Mac.
Option 3. Check Google Drive
If you use Google Drive to back up folders from your Mac, there is a chance that your deleted file is still available in Google Drive or its Trash. Whether you can recover it depends on where the file was stored and how your synchronization settings were configured.
To check:
- Open Google Drive in your browser and sign in to your account.
- Browse My Drive or use the search bar to look for the missing file.
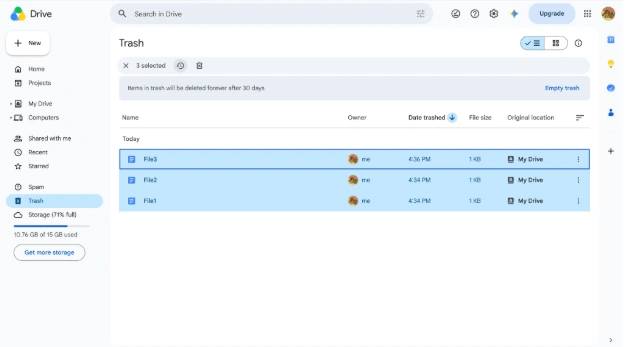
- If you don’t find it, open Trash from the left sidebar.
- Locate the file you want to recover.
- Right-click it and select Restore.
- The file will return to its original location in Google Drive. If that location is synchronized with your Mac, the restored file should also appear on your computer.
Note: If you’ve ever used other cloud storage services, such as iCloud Drive, you can also check whether a copy of your missing file is still stored there.
Conclusion
After you emptied the Trash or otherwise permanently deleted your files, there are still ways to get them back. If you don’t have any backups, your best option is to use data recovery software as soon as possible. A tool like Disk Drill is a great choice for this, provided the files haven’t already been overwritten or permanently erased by TRIM on your Mac’s internal SSD.
If you do have backups, try restoring your files from a Time Machine backup, an APFS local snapshot, or check Google Drive if you use it to back up folders from your Mac. For inexperienced Mac users, a specialized Mac forum is very helpful. There, you can find answers to common questions and discover more information.
FAQs
How to recover deleted files on Mac?
The best recovery method depends on how the files were deleted and whether you have a backup. If the files are still in the Trash, simply restore them from there. If you permanently deleted them and don’t have a backup, use data recovery software as soon as possible before the deleted data is overwritten or TRIM erased them from the internal SSD. If you do have backups, restore your files from Time Machine, APFS local snapshots, or cloud storage services such as Google Drive.
What is the best Mac file recovery software?
Disk Drill is one of the best Mac data recovery software for many users. It has an intuitive interface, supports all major file systems (including APFS and HFS+), lets you scan and preview recoverable files without limits before purchasing, and works on both Apple Silicon and Intel-based Macs. But, no recovery software can restore files from an internal SSD after TRIM has permanently erased the deleted data. If you still have questions about your recovery options or want to read advice from more experienced users, just visit a data recovery forum. You’ll find many topics covered there.
Can I prevent data loss on my Mac in the future?
Yes. The most important step is to make regular backups of everything stored on your Mac using Time Machine. Also keep multiple copies of your important files in cloud storage and on an external drive. Remember to safely eject external drives before disconnecting them, and replace storage devices that show signs of failure.